
By the stylists at Zee Beauty Supply
Bubble braids look intricate, yet they are one of the most forgiving styles you can wear. There is no weaving and no crossing of strands. You create a ponytail, secure it with small elastics at even intervals, and gently puff each section into a soft, rounded bubble. If you can tie a ponytail, you can master this look.
In this guide, we walk you through the classic method, tailored tips for every hair texture, how to go jumbo with braiding hair, and how to keep your edges and ends healthy. If you would rather leave it to the professionals, our team can create the look for you on our services page.
The short version
- Time: 10 to 15 minutes
- Skill level: Beginner-friendly
- Best for: Straight, wavy, curly and coily hair, plus extensions and installed braids
- Key rule: Even spacing is what makes the style look polished
What Are Bubble Braids?
Despite the name, bubble braids are not braided at all. They are a ponytail divided into evenly spaced segments by small elastics, then gently pulled outward to form a chain of soft, rounded bubbles. The look surged with the Y2K revival and is now seen everywhere, from the sidelines to the red carpet.
Because there is no weaving involved, this is an ideal first style for beginners, children, and anyone who has found French or Dutch braids frustrating. For fuller, more sculpted looks, see our style gallery for inspiration.
What You Will Need
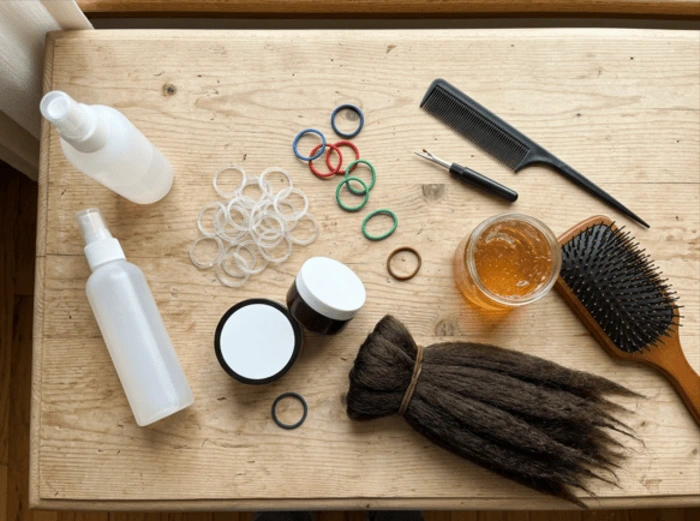
The right tools make the difference between a good result and a flawless one. Gather these before you begin:
- Small snag-free elastics. Clear polybands give a seamless finish, while coloured ones become part of the look. Avoid elastics with metal joins, which catch and break hair.
- A paddle or smoothing brush. This creates a sleek base on straight and wavy hair.
- A rat-tail comb. Essential for crisp parts, especially for pigtails and Dutch bubble braids.
- Styling gel or edge control. This lays down the hairline and the base of the ponytail.
- Leave-in conditioner or styling cream. Adds slip and moisture on curly and coily textures.
- Flexible-hold hairspray or spray gel. Sets the bubbles without stiffness.
- Braiding hair (optional). For longer, fuller, jumbo-style bubbles.
- A seam ripper or small scissors. For removing elastics safely.
Ready to stock up? Explore our hair elastics, edge control and braiding hair, or contact us and we will help you choose the right products for your texture.
How to Do Bubble Braids, Step by Step
The classic single-ponytail method takes about 10 to 15 minutes.
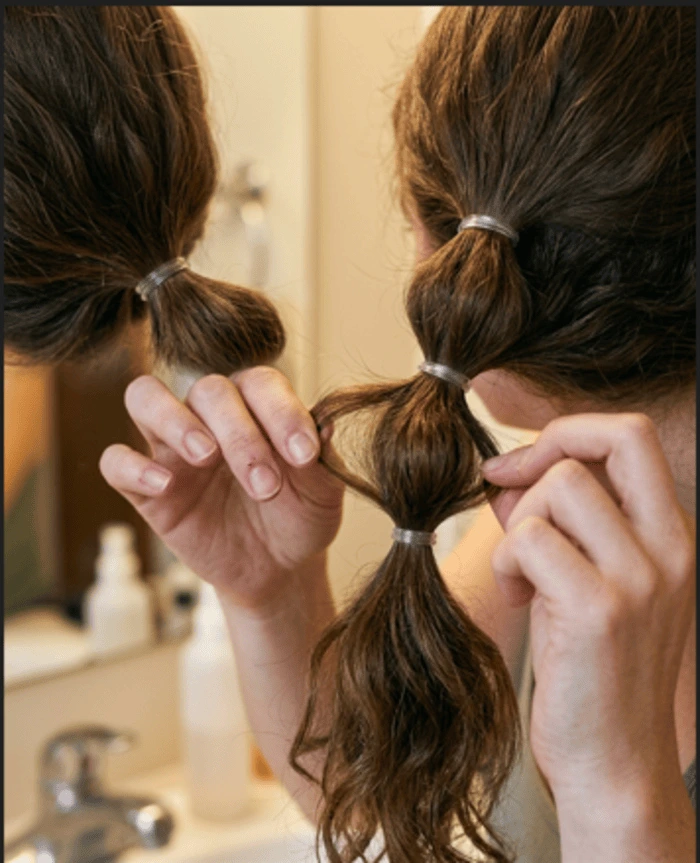
- Prep and detangle. Start with detangled hair. If your hair is curly or coily, add a little leave-in or styling cream so strands stay soft and flexible.
- Create your base ponytail. Smooth your hair into a ponytail and secure it. High looks sporty, low looks refined, and a side ponytail is easiest to work on yourself because you can see what you are doing.
- Lay your edges. Smooth a small amount of gel or edge control along the hairline and around the base. Doing this now prevents flyaways later.
- Add the first elastic. Move 1.5 to 2 inches down the ponytail and secure with a small elastic. It should hold firmly, but you should still be able to slide a finger underneath.
- Puff the first bubble. Hold the hair between the base and the new elastic, then gently tease small pieces outward on all sides, rotating as you go so the bubble is round rather than flat.
- Repeat down the length. Add the next elastic at the same distance and puff that section. Consistent spacing is the secret to a polished finish.
- Finish the ends. Stop 1 to 2 inches from the tips so the ends do not look thin. If your ends are sparse, make the final bubble slightly smaller.
- Set the style. Mist with flexible-hold hairspray or spray gel, and smooth frizz with a touch of gel on your fingertips.
Stylist tip: If one bubble collapses, do not start over. Add one extra elastic just below it for support.
Popular Bubble Braid Styles
Double Bubble Braids (Bubble Pigtails)
Part your hair down the centre with a rat-tail comb, create two pigtails, and repeat the steps on each side. Place the first elastic at the same distance from the base on both sides so they match.
Dutch Bubble Braids
Instead of starting from a ponytail, take a small section at the front hairline and secure it with an elastic. Gather the next section behind it, combine it with the tail of the first, and secure again. Continue down the head, then puff each section. The bubbles sit close to the scalp, similar to a Dutch braid.
Half-Up Bubble Braid
Gather only the top section into a ponytail and bubble it down, leaving the rest loose. It is a lovely way to showcase curls or a fresh silk press.
Jumbo Bubble Braids With Extensions
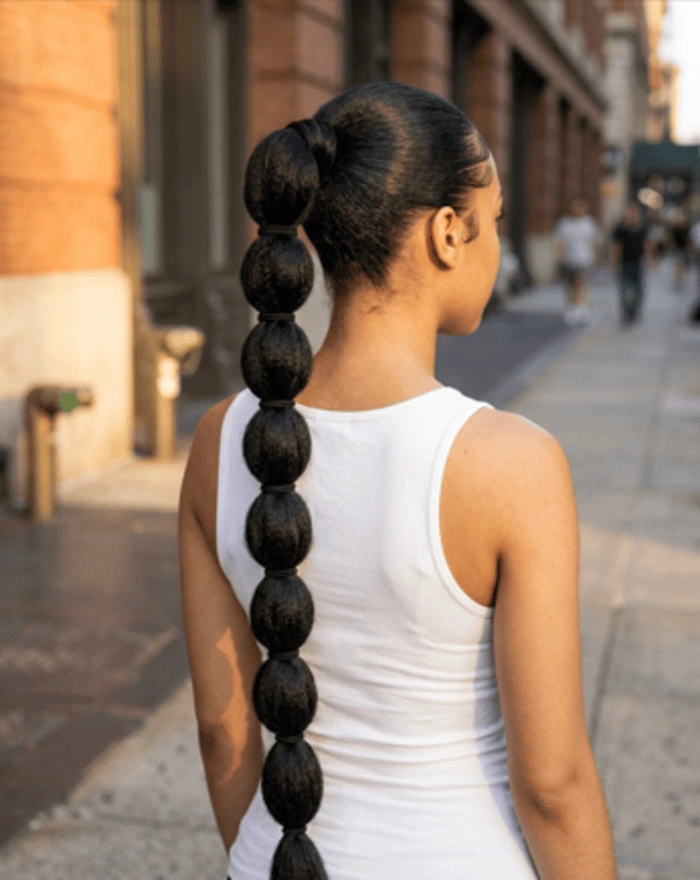
For waist-length bubbles, make your ponytail, wrap a section of braiding hair around the base, and secure it. Blend the extension into your natural hair and bubble down the full length. Pre-stretched braiding hair is easiest to work with. Match your shade, or go bold with ombre or colour. Not confident blending extensions? Book a braiding service with our team.
Bubble Braids With Knotless or Box Braids
If you already wear box braids, gather them into a ponytail and bubble them like loose hair. It is a simple way to refresh a protective style without redoing it. Browse the gallery for more ideas.
Bubble Braids by Hair Type
Small adjustments make a noticeable difference.
- Straight and fine hair (Type 1): Fine hair can slip out of elastics. Use texturizing spray or dry shampoo for grip, and space elastics closer together, about 1 inch apart, for fuller-looking bubbles.
- Wavy hair (Type 2): Lightly mist with curl cream or mousse to control frizz. Your natural texture helps the bubbles hold their shape.
- Curly hair (Type 3): Style on damp, moisturised hair, or on stretched hair for smoother bubbles. Use gel at the base for a sleek finish and pull bubbles gently to avoid frizz.
- Coily hair (Type 4A to 4C): Detangle and moisturise first, then stretch with a low-heat blow-dry, banding, or overnight braids. Stretched hair gives rounder, more defined bubbles. Use edge control and a firm-hold gel at the base, and never pull the ponytail tight around the hairline.
- Short hair: You need roughly 4 to 6 inches of length. Try Dutch-style bubble braids starting at the hairline, or add braiding hair for extra length.
Troubleshooting Common Bubble Braid Problems
| Problem | Likely Cause | Fix |
|---|---|---|
| Flat or skinny bubbles | Elastics too far apart, or pulled from one side only | Space elastics closer and pull from all sides |
| Uneven bubbles | Inconsistent spacing | Measure two fingers between each elastic |
| Top bubbles collapse | Puffing from the top down | Puff from the bottom elastic upward |
| Frizz and flyaways | Dry hair or no hold product | Smooth with gel or a light mist of hairspray |
| Bumps at the base | Rushed ponytail | Brush or smooth again before securing |
| Elastics slide down | Fine or silky hair | Add texture spray or use grippy polybands |
| Thin, stringy ends | Bubbling all the way to the tips | Stop 1 to 2 inches before the ends |
How to Protect Your Hair While Wearing Bubble Braids
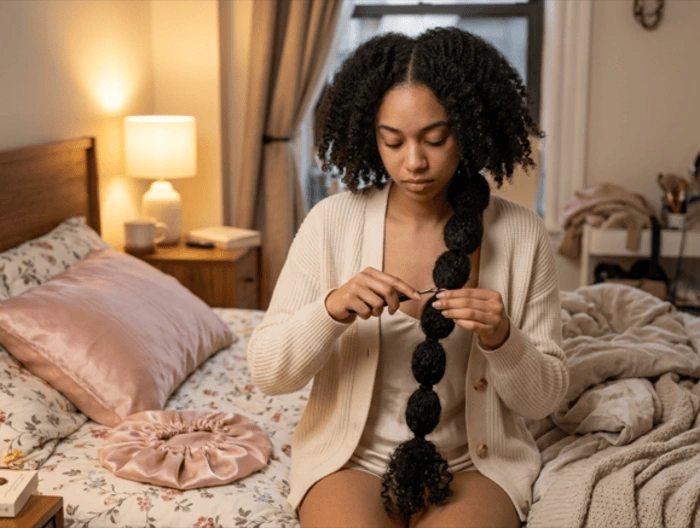
The style itself is gentle, but tension and the wrong elastics can cause problems. Constant pulling at the hairline is linked to traction alopecia, a type of hair loss caused by repeated tension. To keep your hair healthy:
- Keep the base ponytail snug but never tight. Pain, scalp bumps or headaches mean it is too tight.
- Use snag-free elastics, never rubber bands with metal clips.
- Vary your ponytail placement between high, low and side.
- Cut elastics out with a seam ripper or small scissors instead of pulling them.
- Sleep in a satin bonnet or on a satin pillowcase to reduce friction.
- Moisturise your ends after taking the style down.
Have questions about scalp comfort or tension? Reach out to our team for personalised advice.
Bubble Braid FAQs
Is it better to do bubble braids on wet or dry hair?
For straight and wavy hair, dry hair is better. Day-old hair has more grip, while wet hair stretches and dries unevenly. For curly and coily hair, slightly damp, well-moisturised hair is easier to smooth and less prone to frizz. Avoid soaking wet hair, as wet strands are weaker and break more easily under tension.
Are bubble braids hard to do?
No. There is no braiding involved, so if you can make a ponytail and add elastics, you can do them. Most beginners get a good result on the first attempt, and the style is forgiving if the bubbles are not perfectly even.
How do I make bubble braids step by step?
- Detangle and moisturise your hair.
- Make a ponytail at your chosen height.
- Smooth your edges with gel.
- Add a small elastic 1.5 to 2 inches below the base.
- Gently pull that section outward into a round bubble.
- Repeat, spacing elastics evenly down the ponytail.
- Stop 1 to 2 inches from the ends.
- Set with flexible-hold hairspray.
Do bubble braids damage hair?
Not when done correctly. Damage comes from tight ponytails, snagging rubber bands, pulling elastics out, and wearing the same style constantly. Use snag-free elastics, keep tension light, change your ponytail placement, and cut elastics out when you are done.
How long do bubble braids last?
On loose natural hair, they usually last 1 to 3 days. A satin bonnet at night and a quick refresh with gel and hairspray can extend that slightly. Bubble braids made with extensions or over box braids can last about a week. Take them down if your scalp feels sore or itchy.
What is a dragon braid?
A dragon braid is a raised, three-dimensional braid running down the centre or side of the head, resembling a dragon’s spine. It is typically a Dutch (inverted) braid, where strands cross under the middle and hair is added with each pass. Gently pulling out the edges, known as pancaking, makes it look bigger and more dramatic.
What is a Rapunzel braid?
A Rapunzel braid is an extra-long, thick, usually loose three-strand braid that reaches the waist or below. It is often pancaked for volume and decorated with flowers. Most people need braiding hair or clip-in extensions to achieve the length, which makes it popular for weddings, festivals and themed events.
What is the hardest braid to learn?
It depends on the person, but the five-strand braid, Dutch fishtail, lace braid and Dutch crown braid are often considered the hardest. They demand precise sectioning and finger control, especially on yourself. Feed-in braids and cornrows also take time to master neatly. If you would rather skip the learning curve, book a braiding appointment.
Want a flawless finish without the effort?
Our stylists specialise in braids, extensions and protective styles for every texture.
Explore our services | See the gallery | Book a consultation
Keep exploring: More hair guides on the Zee Beauty Supply blog · About us