
How to braid your own hair: the quick answer
To braid your own hair, detangle it, split it into three equal sections, then cross the right section over the middle and the left section over the new middle. Repeat until you reach the ends and tie it off. Keep your hands close to your head, braid by feel instead of watching the mirror, and keep the tension firm but never tight.
That’s the whole secret. The rest is practice.
We braid hair all day at Zee Hair Braiding in Austin. Clients often ask us how to keep up their look between appointments, or how to do a simple braid at home. So we wrote the guide we wish they had.
You’ll learn the easiest braids to start with, how to prep your hair, why braiding yourself feels so awkward, and how to protect your edges while you learn.
IN THIS GUIDE
What you need to braid your own hair
You don’t need much. Most of these are already in your bathroom.
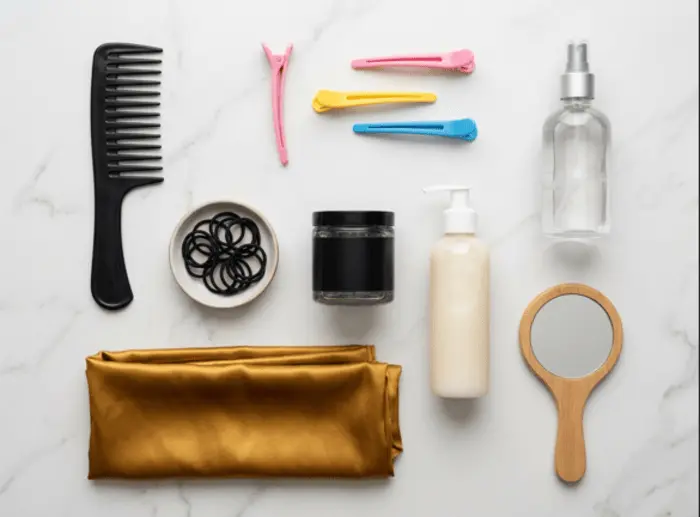
- Wide-tooth comb or detangling brush to remove knots before you start.
- Rat-tail comb for clean parts, especially for cornrows and box braids.
- Sectioning clips to hold hair you aren’t working on.
- Small elastics or soft hair ties to secure the ends. Snag-free ones cause less breakage.
- Spray bottle with water to lightly dampen dry or frizzy hair.
- Leave-in conditioner or light cream for slip and moisture.
- Braiding gel, edge control or mousse if you want a neat, frizz-free finish.
- Two mirrors (one on the wall, one handheld) to check the back once you’re done.
Nice to have: a satin bonnet or silk pillowcase to keep your braids smooth overnight.
How to prep your hair before braiding
Good prep does half the work. A braid on tangled, slippery or dry hair will fight you the whole way.
Detangle first
Comb from the ends up to the roots. Any knot you miss will catch in the braid and pull.
Wet, damp or dry?
Slightly damp or fully dry hair is best. Soaking wet hair is weaker and stretches more, so pulling on it can cause breakage. It also shrinks as it dries, which tightens the braid at your scalp.
- Straight or fine hair: braid it dry, ideally on day-two hair. Freshly washed hair is too slippery to grip.
- Wavy hair: braid it damp for heatless waves, or dry for a sleek look.
- Curly and coily hair (3C–4C): work on damp, moisturized, stretched hair. Braiding on blown-out or stretched hair reduces shrinkage and tangles.
Gel or no gel?
Use gel when you want a neat, polished braid that lasts. It grips slippery strands, smooths flyaways and keeps parts crisp. That’s why braiders use it for cornrows and box braids.
Skip gel for soft, casual braids or if your hair gets dry easily. If you do use it, pick a moisturizing, alcohol-free braiding gel and use a little. Too much leaves white flakes and buildup.
Moisturize
A light leave-in conditioner or cream gives your fingers slip. It also protects your strands from friction as you cross them.
How to do a basic three-strand braid on yourself
The three-strand braid (also called a plait) is the base of almost every other braid. Learn this one first.
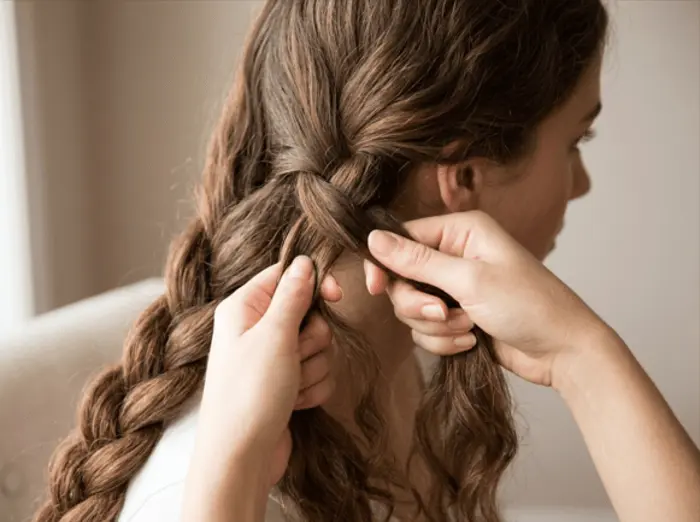
- Bring your hair forward. Pull it over one shoulder, or into a low ponytail. Both put the hair where your hands can reach it easily.
- Split it into three equal sections. Left, middle and right. Even sections give an even braid.
- Hold the sections. Keep the left section in your left hand, the right in your right, and let the middle rest between your fingers.
- Cross right over middle. The right section now becomes the middle one.
- Cross left over middle. The left section now becomes the middle one.
- Repeat. Right over middle, left over middle. Keep a steady, gentle pull on each section.
- Secure the ends. Stop about an inch from the bottom and tie it with a small elastic.
- Loosen if you like. Gently pull the edges of each loop for a fuller, softer braid.
Beginner tip:ner tip: say “right, left, right, left” out loud. It sounds silly, but it keeps your rhythm steady until your hands remember it.
The easiest braids for beginners (and what to try next)
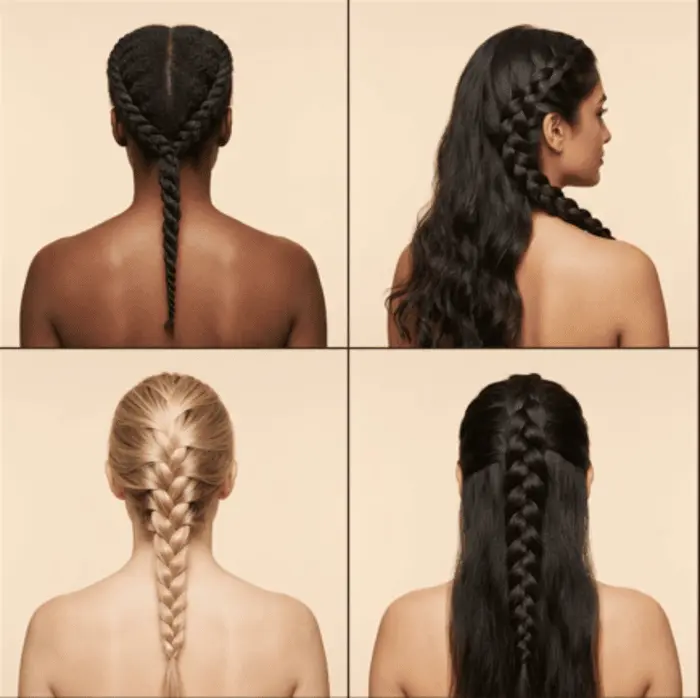
Start at the top of this list and move down as your hands get faster.
| Braid | Difficulty | Best for | Time to learn |
|---|---|---|---|
| Rope braid / two-strand twist | Easiest | All hair types | One sitting |
| Side three-strand braid | Easy | Medium to long hair | One sitting |
| Pigtail braids | Easy | Even layers, kids | A few tries |
| French braid | Medium | Medium to long hair | A week of practice |
| Dutch braid | Medium | Thick hair, bold looks | A week of practice |
| Fishtail braid | Medium | Long hair | A few tries |
| Cornrows on yourself | Hard | Natural and textured hair | Weeks of practice |
| Box braids on yourself | Hard (and slow) | Natural hair, protective styling | Weeks of practice |
Rope braid (two-strand twist)
This is the easiest braid to do on yourself because you only manage two sections. Split your hair in two. Twist each section to the right, then wrap them around each other to the left. The opposite directions lock it in place.
Side braid
This is a three-strand braid pulled over one shoulder. You can see your hands the whole time, so it’s the best way to practice.
Pigtail braids
Part your hair down the middle and do a three-strand braid on each side. Each braid is smaller, so it’s easier on your arms. Want a playful variation? Try our step-by-step guide to bubble braids, which only needs ponytails and elastics.
French braid
Start with three small sections at the top of your head. Cross them once like a normal braid. Then, before each cross, add a thin piece of loose hair from that side into the outer section. Keep adding until you reach the nape, then finish with a regular braid.
Dutch braid
This is a French braid done inside out. Cross the sections under the middle instead of over. The braid sits on top of your hair and looks bolder. Many people find it easier to do on themselves.
Fishtail braid
Split your hair into two sections. Take a thin piece from the outside of the left section and cross it over to the right. Repeat on the other side. Thinner pieces give a more detailed braid.
Cornrows and box braids
These are protective styles that take patience. We cover them in the natural hair section below. To see how a finished set looks, browse real client work in our braid gallery.
Why is it so hard to braid your own hair?
If you can braid someone else’s hair but not your own, you’re not alone. Braiding yourself is harder for a few simple reasons, and each one has a fix.
| The problem | Why it happens | The fix |
|---|---|---|
| The mirror confuses you | A mirror flips left and right, so your brain fights your hands | Braid by feel. Close your eyes if it helps, and use the mirror only to check |
| Your arms get tired | Holding your arms up behind your head is a workout | Tilt your head toward the side you’re braiding, or rest your elbows on a counter |
| You can’t see the back | Your hands are working blind | Start with side braids and pigtails, then move to the back |
| The braid is loose or uneven | Tension slips every time you stop | Keep your hands close to your scalp and your pull steady |
| Hair slips out of your fingers | Freshly washed or fine hair has no grip | Braid day-two hair, or add a little mousse, texture spray or gel |
| Layers poke out | Short layers don’t reach the next cross | Use a little gel or pomade, or switch to a Dutch braid |
The good news? It’s muscle memory. Most people get it after a week of five-minute practice sessions.
How to braid natural and textured hair yourself
Curly and coily hair holds a braid beautifully. It just needs more moisture and smaller sections.
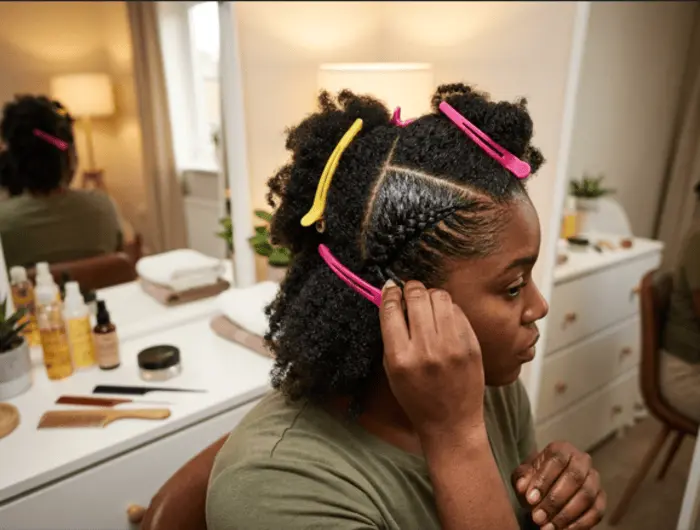
Start with two-strand twists
Twists are the easiest protective style to do on yourself. Section damp, moisturized hair, split each section in two, and twist them around each other to the ends. They’re fast, gentle and a great first step before braids.
Cornrows on yourself
- Part a clean row with a rat-tail comb and clip the rest away.
- Apply a little braiding gel along the part for grip and neat edges.
- Pick up three small pieces at the front of the row.
- Braid under (like a Dutch braid), adding a little hair from the row each time.
- Keep your fingers close to the scalp so the row stays flat and straight.
- Finish the length as a regular braid and secure it if needed.
Start with two or three big cornrows going straight back. Small, curved or feed-in designs are much harder on your own head.
Box braids and knotless braids on yourself
You can do them, but plan for a long day. A full head often takes many hours, even for experienced braiders. Use mirrors to keep your parts even, and work in small batches so your arms get breaks.
Knotless braids are gentler on the scalp because hair is fed in gradually. They’re also harder to start on your own, so many people save them for the salon.
Natural hair tips
- Stretch your hair first (banding, threading or a gentle blowout) to cut down shrinkage and tangles.
- Seal moisture in with a light oil, focusing on the ends.
- Never braid so tight that you see bumps or feel pain at the hairline.
The downsides of braiding (and how to avoid them)
Braids protect your hair when they’re done right. Done too tight or left in too long, they can do the opposite.
Traction alopecia
Traction alopecia is hair loss from repeated pulling at the root. It usually shows up at the temples and along the hairline. Warning signs include small bumps, tenderness, stinging, or a pulling feeling on your scalp. Caught early, the hair often grows back within months. Left too long, it can scar and become permanent (University of Iowa Health Care).
Other downsides
- Breakage from braiding dry, brittle or soaking wet hair.
- Headaches and scalp soreness from braids that are too tight.
- Dryness and buildup when braids stay in for weeks without care.
- Matting at the roots when braids are left in too long.
- Time. Big protective styles can take hours on your own head.
How to keep your hair healthy
- Braid firm, not tight. You should forget you’re wearing it.
- Keep edges loose and avoid tiny braids right at the hairline.
- Change your part and braid placement so the same spots don’t take all the tension.
- Moisturize your scalp and length a few times a week.
- Sleep in a satin bonnet or on a silk pillowcase.
- Give your hair a break between long-term styles. Many braiders suggest taking box braids out within 6–8 weeks.
- If it hurts, take it out and redo it looser.
When to let a braider take over
DIY braids are perfect for everyday styles. Some looks are worth handing to a pro, though:
- Knotless braids, Fulani braids or boho braids with extensions
- Small box braids or Senegalese twists that take many hours
- Curved or detailed cornrow designs
- Any time your edges are thinning and you need low-tension work
NEED A PRO?
Let us braid it for you
At Zee Hair Braiding in Austin, we focus on neat, low-tension styles that protect your natural hair and edges. Explore our braiding services, get ideas from the gallery, or call (512) 903-2088.
Frequently asked questions
What is the easiest way to braid your own hair?
The easiest way is to pull your hair over one shoulder and do a three-strand side braid. You can see your hands, your arms stay low, and you can fix mistakes as you go. Once that feels natural, move the braid to the back.
Is it better to braid hair wet or dry?
Slightly damp or dry hair is best. Soaking wet hair is fragile and stretches, so it breaks more easily and tightens as it dries. Straight hair braids best dry. Curly and coily hair braids best damp, moisturized and stretched.
How do you do hair braids for beginners?
Detangle your hair, split it into three equal sections, then cross the right section over the middle and the left section over the new middle. Repeat to the ends and tie it off. Practice on a side braid or ponytail for a few days before trying French or Dutch braids.
Is there a tool to braid your own hair?
Yes. Electric and hand-held hair braiding tools can twist or braid small sections for you, and loop tools help with flipped and “pull-through” styles. Most people still find their fingers, a rat-tail comb, sectioning clips and two mirrors more reliable than any gadget.
What is the easiest braid for beginners?
The rope braid (two-strand twist) is the easiest because you only manage two sections. After that, the classic three-strand braid is the best one to learn, since French, Dutch and fishtail braids all build on it.
Why is it hard to braid my own hair?
The mirror flips your image, your arms tire from being held up, and you can’t see the back of your head. Fresh, slippery hair makes it harder still. Braid by feel, tilt your head toward your hands, and practice on day-two hair.
What are the downsides of braiding your hair?
Tight or long-worn braids can cause traction alopecia, breakage, scalp soreness, dryness and buildup. Big protective styles also take a lot of time. Braid firm but not tight, keep your edges loose, moisturize, and take breaks between long-term styles.
What does God say about braided hair?
The Bible mentions braided hair in 1 Peter 3:3–4 and 1 Timothy 2:9. Both passages tell believers to focus on inner character and modesty rather than showy outward adornment. Many Christians read this as a caution against vanity, not a ban on braids, though some traditions interpret it more strictly. 1 Corinthians 11:15 also calls a woman’s long hair her glory.
Is it better to braid with or without gel?
Braid with gel for a neat, long-lasting style. It grips slippery hair, smooths flyaways and keeps parts crisp, which is why it’s used for cornrows and box braids. Skip it for soft, casual braids or very dry hair. Choose a moisturizing, alcohol-free gel and use only a little.
Final thoughts
Braiding your own hair is a skill, not a talent. Start with a side braid, braid by feel, keep your tension gentle, and give your hands a week. Your scalp and edges will thank you for going slow.